Machine Sewn Ornaments DH found!

Saturday, December 20, 2008

I mentioned in one of my earlier posts about my handmade ornaments. Well, My hubby found some wonderful machine sewn ornaments at a flea market. I think flea markets are some of the best places to find Holiday decor.When he saw them I immediately bought them. He did not pay much since they were three for a dollar. I was wishing I had followed my sisters' direction in high school and learned to use a sewing machine. You see my sisters took home economics in high school while I took band ( I can play several instruments including Tenor Saxophone, Clarinet and piano).

I can sew by hand and make Barbie doll clothes and other crafts. I remember when my older sister "D" taught me how to make my first doll outfit for my Barbie dolls. It wasn't perfect but it was mine and that was enough for me. Since then, my doll collection at one time grew to over 400 Barbie dolls. I started learning to customize my dolls with handmade clothing and painting their faces and adding eyelashes too. After having children, I put Barbie on the back burner and sold most of my collection except a few dolls I had from my childhood.
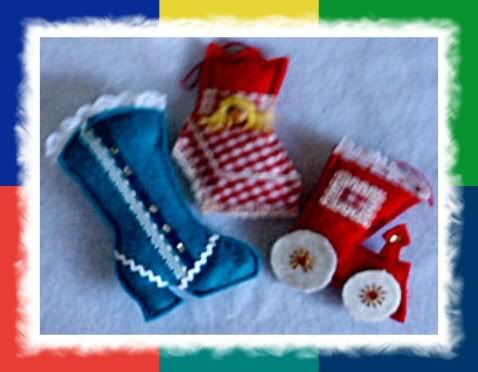
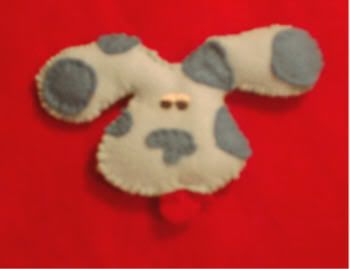
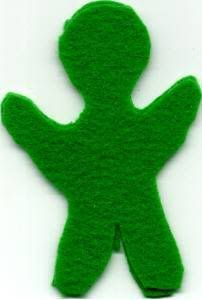
Okay, I started rambing didn't I? Back to the ornaments.. Again I did not make these ones pictured below but I wish I had. I think I am going to try and borrow my sister's sewing machine so I can learn how to make these. The train is my favorite even though you'd think I would have like more the doll in bed... My hubby likes the Lady's boot.

I think the person who made them did a great job. I would never take credit for something I did not make myself. I am hoping after the holidays to try and make my own patterns to make some like these. I have my treasures hanging on my tree proudly and thankful that someone so creative made these...

Read more...

Indian Corn Pins

Saturday, November 22, 2008

I have seen these pins before online at other sites and wanted to try making my own for family. I had some tri-beads left over from the year before.

I used Fall colored tri-beads. I used brown paper twist instead of the brown paper ribbon that it asks for in the instructions.

Materials Needed:
Chenille stems (pipe cleaners)
6mm faceted beads (fall colors – golden yellow)
Tri beads (fall colors)
Tacky Glue (Aleene’s for example)
Pin backPaper Ribbon (light brown, tanish)
Raffia - natural

Directions:
Step 1:
Cut a 2 ½ inch piece of chenille. Glue a 6 mm faceted bead to the end of the chenille stem. String 11 Tri-beads on the chenille stem in a random color pattern. Make sure the beads nest together and trim the chenille to ¼ inch.

Step 2:
Cut a 4 x 1 piece of paper ribbon. Trim the ends – rounded bottom, slightly pointed top.

Step 3:
Glue the beaded chenille stem to the paper ribbon by placing glue on the
¼ inch length of stem and pressing the paper ribbon around it.

Step 4:
Repeat steps 1 through 3 for as many individual ears of corn as you wish to make. I used 3 to make a pin.

Step 5:
Glue the three corn ears together at the neck. Cut three 14-inch lengths of raffia and tie a bow around them.If you prefer you can do one ear or two ears of corn for a pin – I used three)

Step 6:
Glue a pin back on the back of the corn.

I got the instructions from a girl scouts web site.
http://www.geocities.com/gsmahtomedi/IndianCorn.html

They show a picture of their pin on the site.

Read more...

Blues Clues Felt Pin

Monday, September 29, 2008

Blues Clues Felt Pin


This is a felt pin I made several years ago that I though I'd share here in my craft blog. The felt pins were made as Party Favors for my oldest son's birthday. He was a big fan of the Blues Clues show. Now my youngest son who is a toddler enjoys the show and I plan on making some for him.

Blue was made with two colors of felt. The darker of the two is called "blueberry" that I purchased at Walmart. It may also go by the name"royal blue." The lighter of the two is called "light blue." I have seen it also called "sky blue." I used red felt for her tongue.

As you can see below, Blue's head has a basic puppy shape and then I started adding her spots.
Making Blues Clues felt pin

I could not find googly eyes small enough and I wanted the eyes oval shaped so I opted to stitch the eyes by hand. I used embroidery thread but I suppose you can use regular sewing thread instead.

I used Polyfil batting to stuff the pin with. I find it easier to shape with than using cotton balls. I did not use a blanket stitch as I now do with most of my felt projects. I figured the kids would pull on the stitching if I did.

Overall I think I did a good job with Blue! Here she is below!
Blues clues pin

Read more...

My Halloween felt pins (Frankie and Dracula)


Last year, I had been working on making some Halloween felt pins for a party my family was attending. I don't like making scary Halloween crafts like witches. I much perfer making "Kid friendly" crafts like these pictured.

My "Frankie" Felt Pin was made with green and black felt. Grey felt was used to make his bolts on the sides.

Dracula, was made with pink, white and black felt. I even shaped his ears pointed. My husband noted that Dracula looked more like 'Count Chocola" from the cereal box. I suppose he does!

I bought the googly eyes and pom poms at my local Dollar Tree (They have expanded their crafts section!) I am always on the lookout for getting inexpensive craft materials.

The kids loved these! My oldest son perfers "Frankie" over "The Count."
Which do you prefer?

Read more...

My Halloween Mummy Pin

Sunday, September 21, 2008


One of my favorite crafts is making felt pins. I get my best ideas looking store catalogs and one of my favorite sites to get one is from Terry's Village.

I made a felt mummy pin. Here's how I made mine. First I started with scrap felt for the body of the mummy. He sort looked like a gumby shape (for those who can remember the show).

Mummy pattern for felt pin
In the beginning he did not look like much...he only had the makings that only a "mummy" could love. (sorry I could not help but make that joke)

Once the body was stuffed, I added goggly eyes and a pom pom nose (which was like left over from the pervious year I made reindeer pins). It doesn't matter that the stitching is shown because I will be adding his mummy dressings.
mummy in the making
Then I added strips of off-white felt that I have added with tacky glue all over the body and sewed a small piece of black felt (as a tear on the felt mummy). Then as a treat for myself, I used it in photo shop to make a Halloween siggy.

Here's my finshed Mummy Pin!
Photobucket

Well, what do you think of my Mummy?

Read more...

Crystal Wreath made with Sunburst or Tri beads

Saturday, September 20, 2008

Make a wonderful gift as a holiday pin or ornament this Holiday season!

Materials: Aluminum or Brass wireSunburst or Tri Beads of choice [any size will work]
Needle nose pliers
Ribbon bow


Directions:
The amount of beads will depend on the desired size. For this wreath, use 24 Sunburst beads.

1. Cut a piece of wire about 1 inch larger than the size you would like your wreath to be.

2. Feed your beads onto the wire. Using pliers twist the wire to secure the circle of beads. Using sunburst or tri-beads will help in forming a perfect circle as these beads lock into each other.

3. Cut away any excess wire and attach a small ribbon bow with either wire or hot glue.

Read more...

Something new for me...

Today, I embark on new territory... I am now a craft blogger. Blogging is not new to me in fact my oldest blog (or what we called online journals) started in 2000. I wrote about my life as a parent of a preemie and special needs child and the challenges we face together as a family. From there, I started homeschooling in 2003 and then began blogging about our homeschool adventures on Wordpress. I started posting my crafts there in a small section I called my "creative side."

My love of crafts grew all the while. along side my devotion to homeschooling my children. I started a cafemom group a year ago called "Simply Homemade" and I enjoy it. Recently, while searching for ideas to fall crafts I came across a blog site...it was a crafter's blog and my thoughts were "Why did I not think of this before?"

Now here I am working on my crafting blog and I am so excited. Finally. something new for me....

Read more...

Blog template by simplyfabulousbloggertemplates.com

Back to TOP